Follow my blog with Bloglovin
Hi Everyone,
I'm still around but have been very busy with life. My last semester is almost over and I'm trying to get back into the crafting groove. I never finished my April calendar pages, and haven't even thought of May yet. Maybe I'll catch up, maybe not.
I'm sure most of you know by now that Google is getting rid of it's reader this summer. Click the link above to follow me over on BlogLovin. It's easy to sign up and use.
Crafty posts are coming soon. I've been doing a lot with one of Letter Delight's newest SVG sets.

April 28, 2013
March 12, 2013
March Art Journal
I'm posting this a bit late, but it's actually been done for a while. Instead of doing a daily journal, I decided to do weekly summaries. To me, March is the beginning of the rest of the year. Flowers like daffodils and tulips start to send up shoots, trees are forming leaf buds. I don't like winter and March gives me hope.
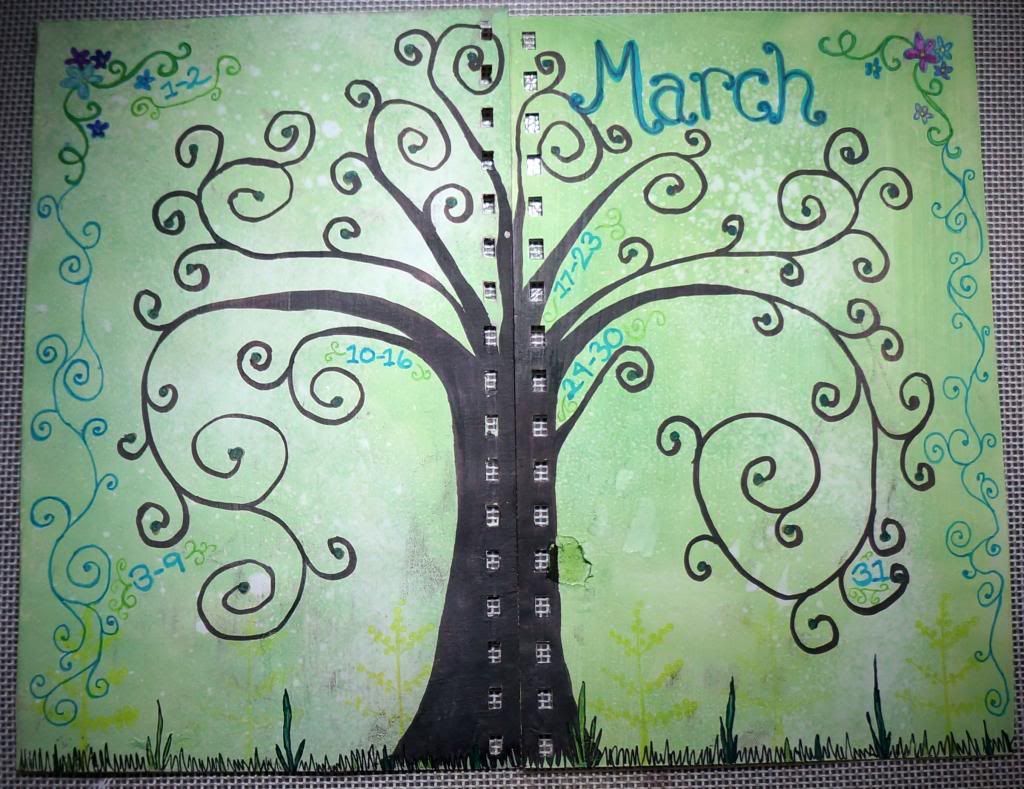
This page was very simple. I just inked up the background, stamped a couple of images and the rest is doodling with markers
This page was very simple. I just inked up the background, stamped a couple of images and the rest is doodling with markers
February 20, 2013
Wedding Scrapbook
My sister-in-law got married this past August. For her bridal shower gift, I made her a scrapbook. For the actual shower, I had the cover done and most of the layouts set up inside, but obviously had no photos. In the end, I ended up putting the photos in and embellishing as well so she had a completed scrapbook. This is the cover.
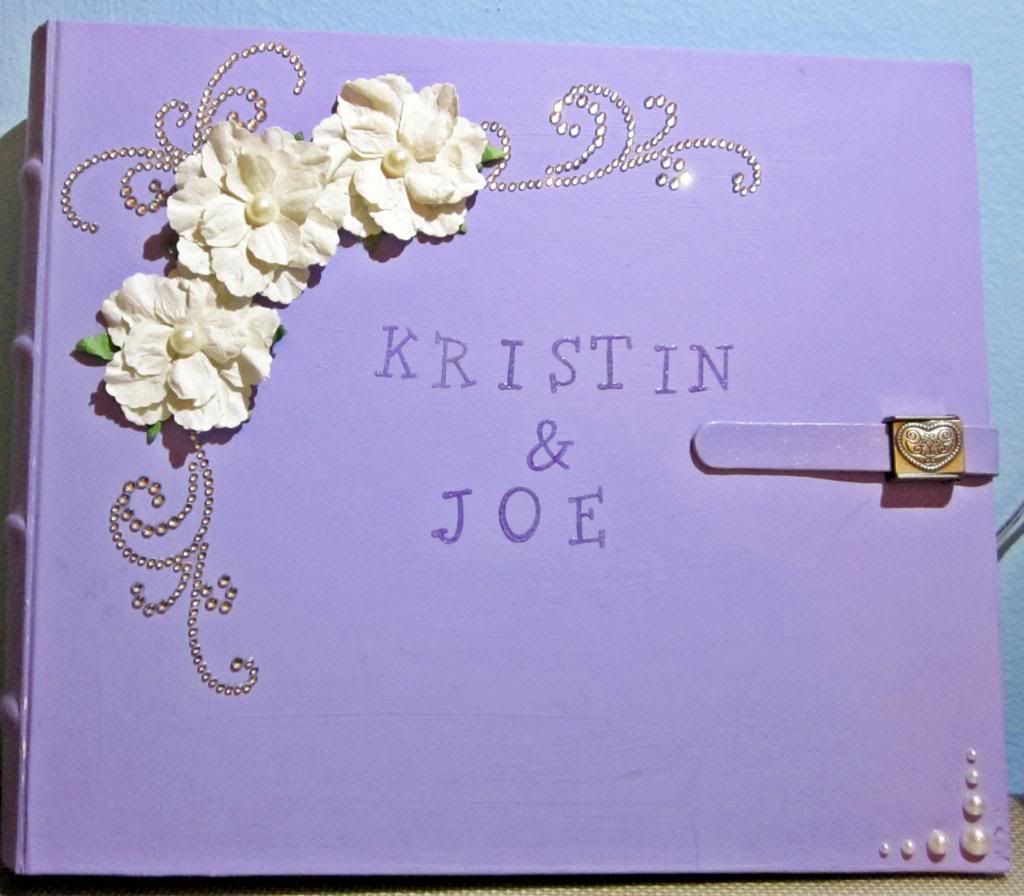
I used:
Some Prima flowers
A Bind-It-All 8x8 Cover-All, and heart shaped Rivet closure.
and some extra bling in the lower right corner.
For the Want2Scrap bling, I cut up the original piece to get others that could be spread out. It made a completely different design that works well with the flowers.
Linking up at: February 2013 Time2Create Challenge
February 14, 2013
Happy Valentine's Day!
Happy Valentine's Day! I made sugar cookies for my in-laws and my husband this past weekend. It's the first time I've ever decorated cookies like this before. Normally, I hate rolling and cutting out cookies. It's so time consuming and difficult. However, the recipe I used was very easy to work with. I had a lot of fun making these.
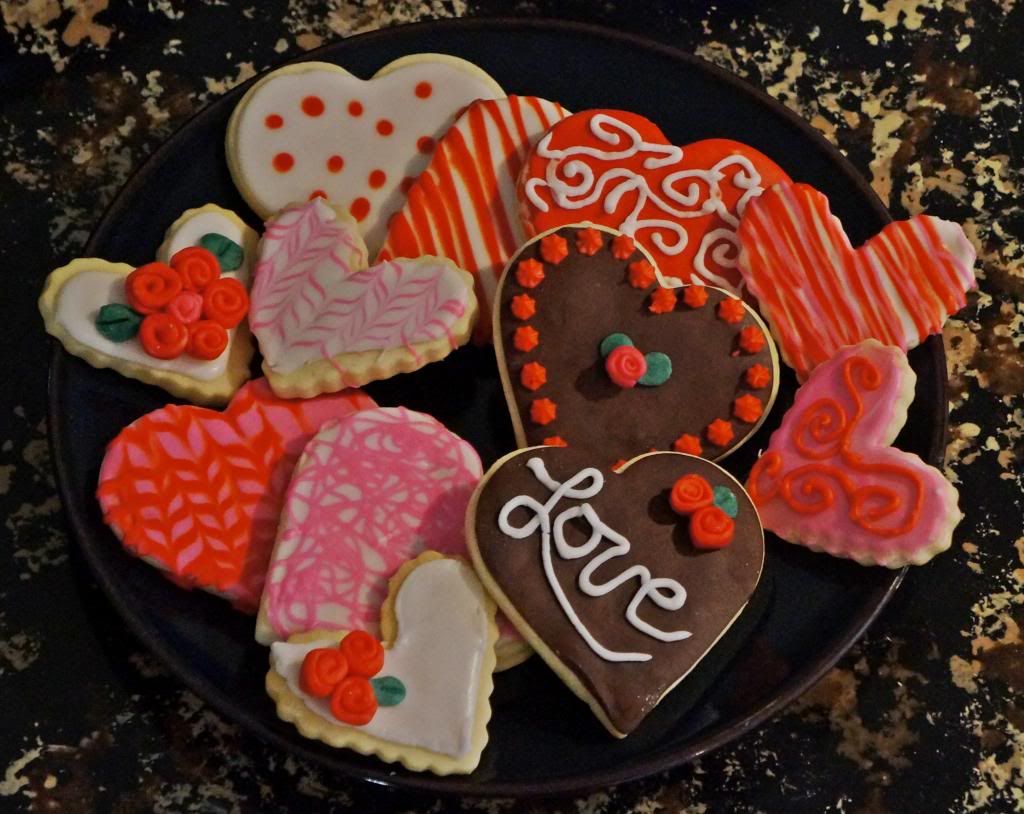
I used 3 recipes from Karen's Cookies...her Basic Rolled Sugar Cookies, Meringue Powder Buttercream and Candy Clay. The buttercream was flavored with vanilla and raspberry flavorings. I also made two batches of the Candy Clay...semi-sweet chocolate and white chocolate. The white chocolate was mixed with different colors for the mini roses and leaves. I'm not very good at piping yet, but hopefully I'll get better. The cookies are very good.
I also made a few horse cookies for my mother-in-law.
February 9, 2013
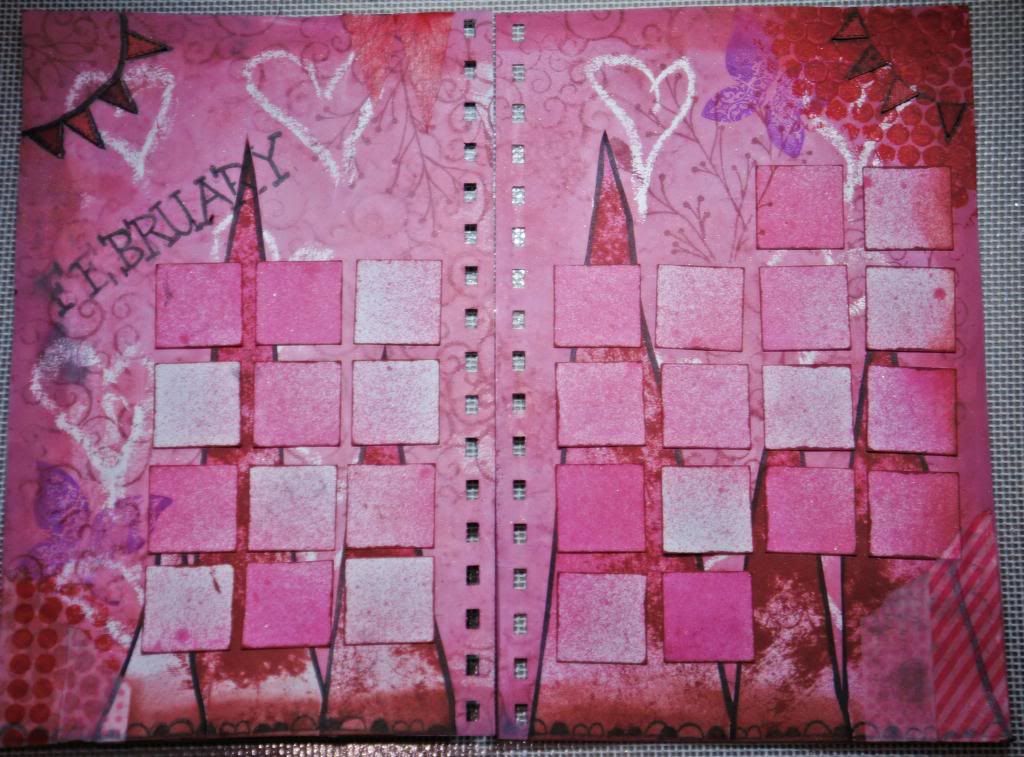
February Art Journaling
Here are my February art journaling pages. I'm finding that filling out each day is difficult to do. For March, I might try making strips and doing a weekly summary instead of individual days.
Linking up at The Kathryn Wheel
I used clear candle wax to draw on the hearts, then inked and layered over them. This layout has many more layers than my January one...but still needs some more bling.
Linking up at The Kathryn Wheel
February 8, 2013
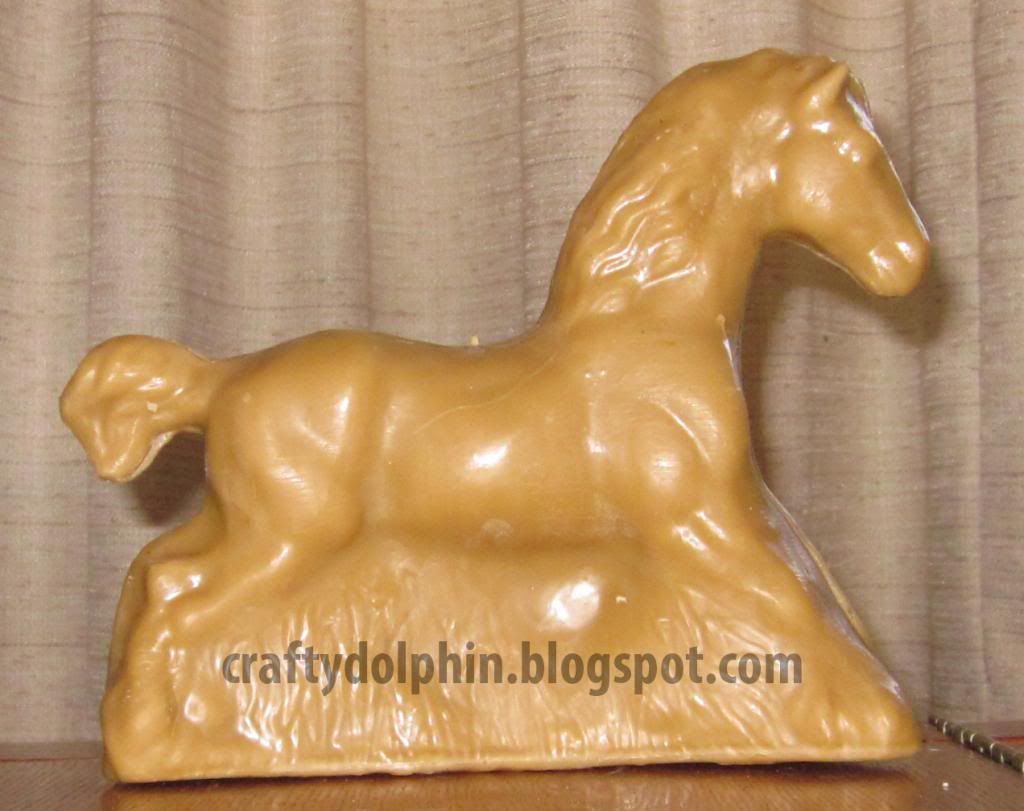
Beeswax Candle
My father-in-law has several hives of bees which means beeswax! For Christmas, I was able to clean up enough wax to make this horse candle. The wax isn't as clean as it should be, but I'm still learning.
February 3, 2013
A CAS(E) Birthday Card
I made a simple birthday card for my mom following along with this weeks CAS(E) sketch.
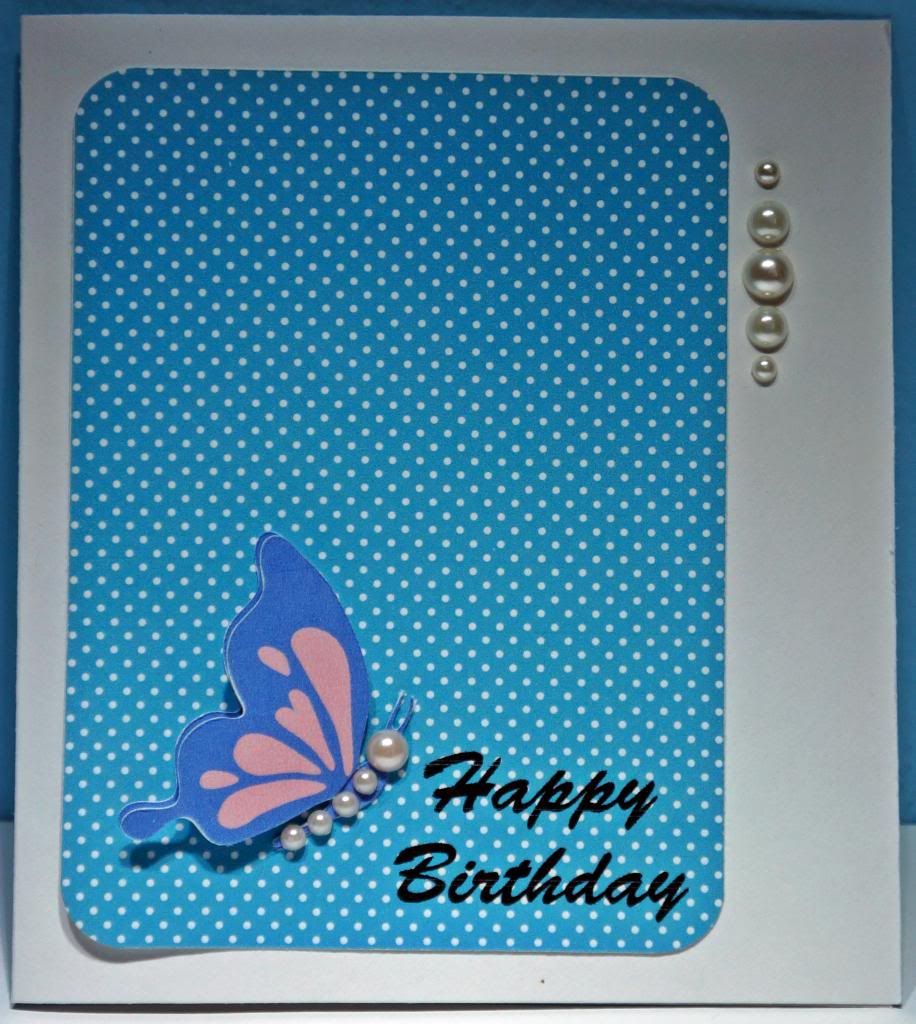
I wanted to make the butterfly look more dimensional, so I print-and-cut two sets of butterflies, attached them at the body, then added a pop dot to make one of the wings stick out more.

I wanted to make the butterfly look more dimensional, so I print-and-cut two sets of butterflies, attached them at the body, then added a pop dot to make one of the wings stick out more.

January 26, 2013
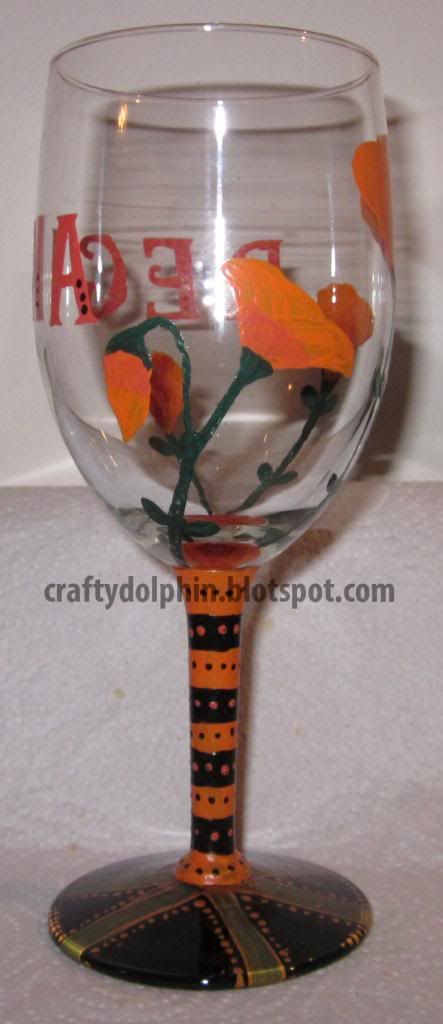
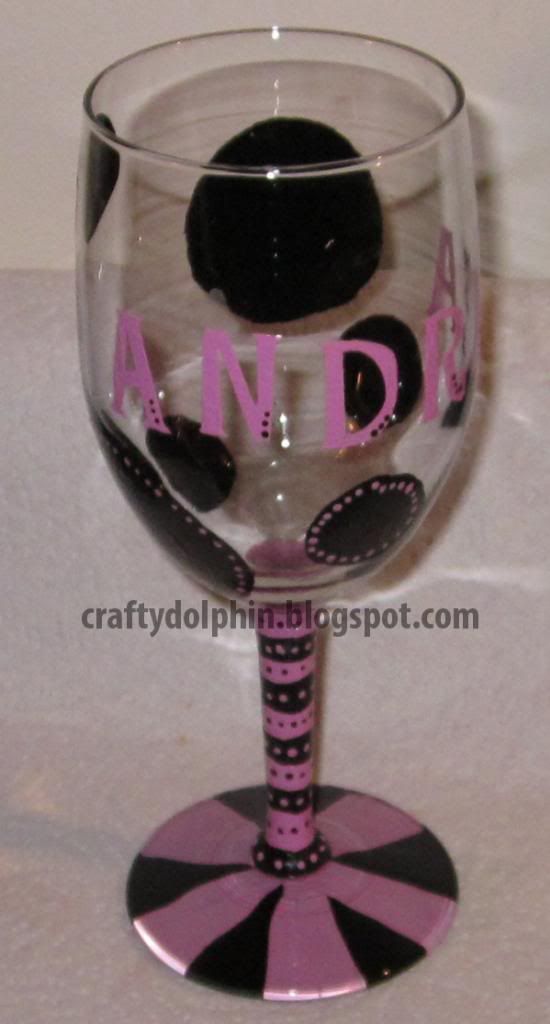
Painted Wine Glasses
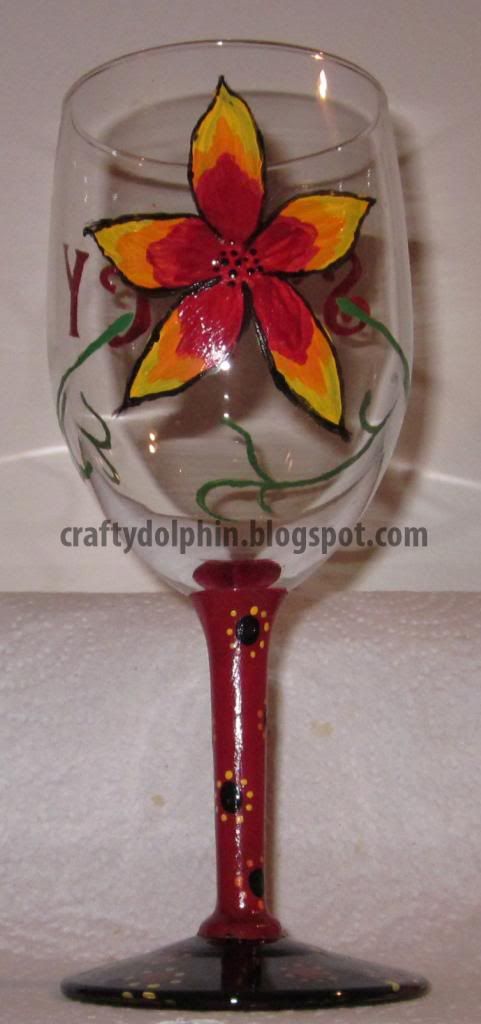

These wine glasses were Christmas gifts for several women in my family. I hand painted each glass, though I did use stencils for the names. My hands are very unsteady, but discovered that I could go back and scrape off a little bit of the paint if a line turned out lumpy or I had a bump, or another mistake. Alcohol also dissolved the paint. These techniques only worked for a few days after the paint was applied though. For Ashley's glass, I used a Q-tip dipped in paint for the dots. For all the glasses, the tiny little dots on the names and other places were made using a toothpick dipped in paint.
January 22, 2013
Another Christmas Card
This card follows along with the simplicity theme I've been enjoying lately. The card was designed with Make-the-Cut and Lettering Delights Nordic Christmas svg files. It was printed out then layered on top of the card with a red layer. I added some Want2Scrap bling in the corners for some shine.
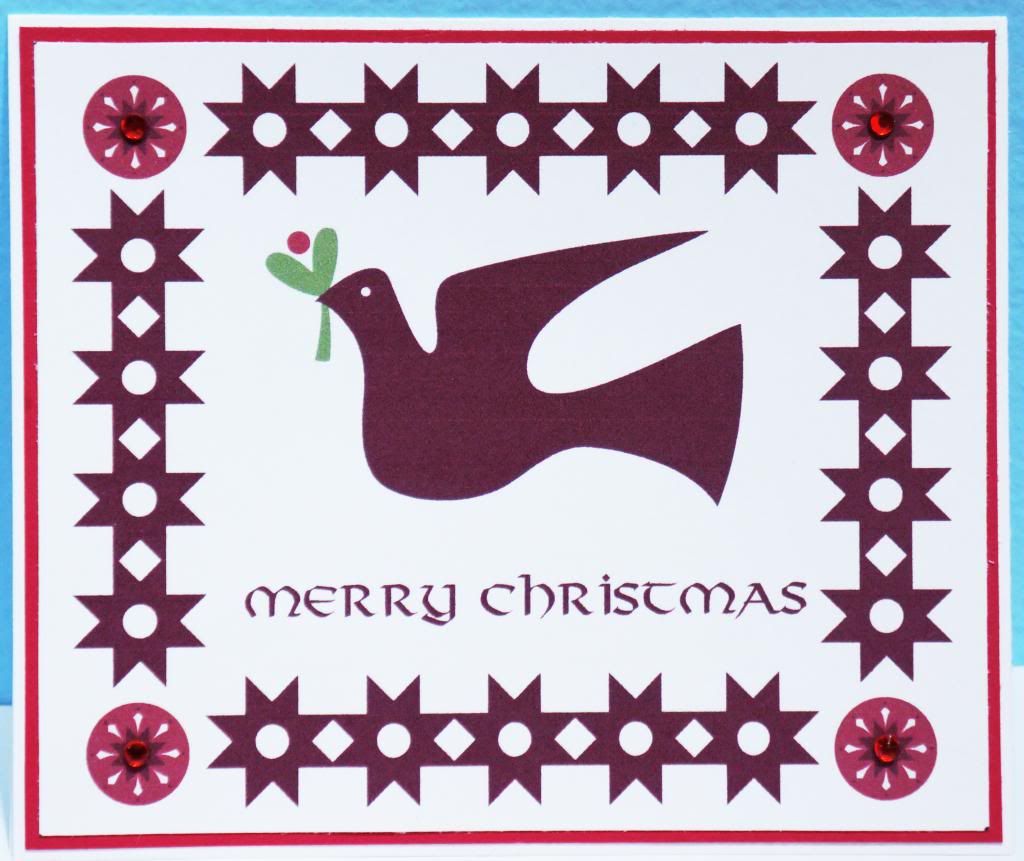 I'm entering this card in two challenges. The Jingle Belles Scandinavian Challenge's criteria was to make a card using the color red. I also stuck to their Scandinavian inspiration.
Alway's Playing With Paper's Merry Monday challenge is to use birds in your Christmas card.
Alway's Playing With Paper's Merry Monday challenge is to use birds in your Christmas card.
January 21, 2013
Valentine's Card
In these cold and wintery months, I'm finding myself wanting to spend most of my time home curled up under an electric blanket on my couch. Not very conducive to crafting with paper, stamps, adhesives and so on. I stumbled on the CAS(E) this Sketch! blog and had one of those "omg this is perfect" moments. I like simple cards. Whenever I try to create something with lots of layers and paper piecing, I'm never happy with it. My love of simple cards and lack of motivation has led me to start using the print and cut function in my Make-the-Cut software. I can design the card on my laptop...under my blankets of course. Then move to the office to print and cut it. Just a few quick embellishments later and voila! A nice, simple card with that touch of homemade flair.
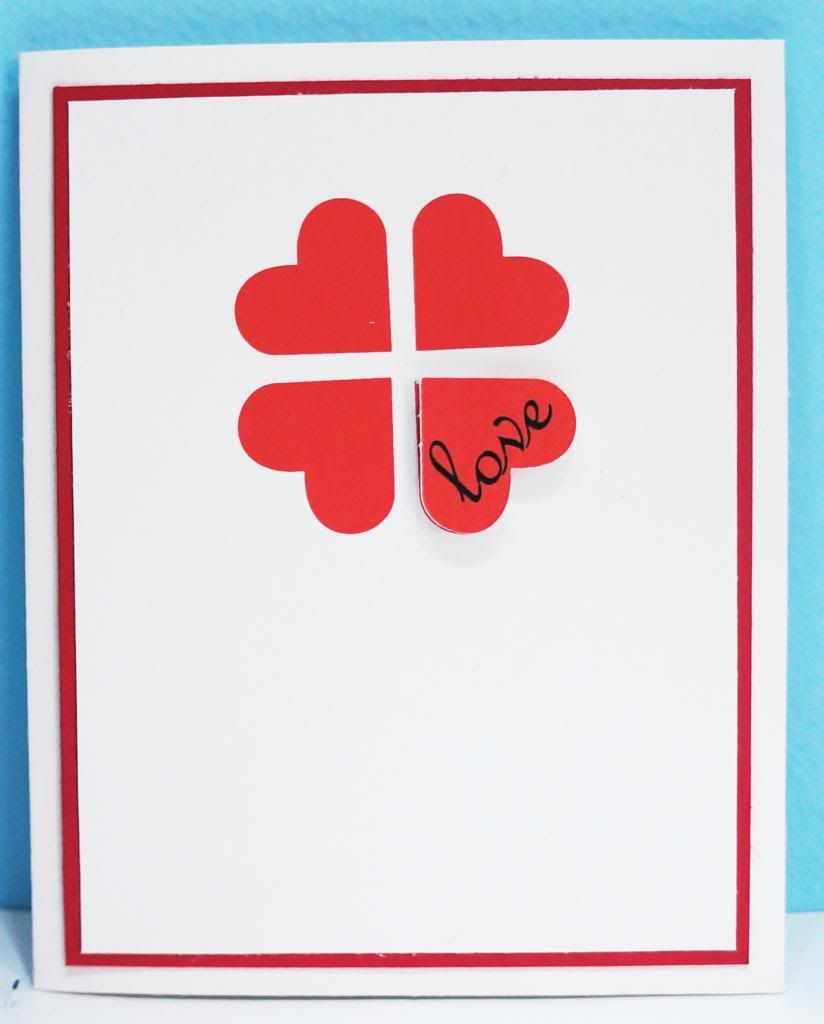
For this card, I just used a basic heart shape in the software and a standard font found on my computer. I cutout the love heart so it could be popped out of the card. It adds that special something. I think this card will be sent to a dear friend of mine.
The Sketch:

For this card, I just used a basic heart shape in the software and a standard font found on my computer. I cutout the love heart so it could be popped out of the card. It adds that special something. I think this card will be sent to a dear friend of mine.
The Sketch:
January 19, 2013
Beer Soap
For Christmas, I made two batches of beer soap. My brother has been home brewing for a while now and I thought it might be nice to make some soap with some extra beer he had. There were two types I made. The one pictured below is one I consider more girly. It has some extra oils in it and the scent is stronger.
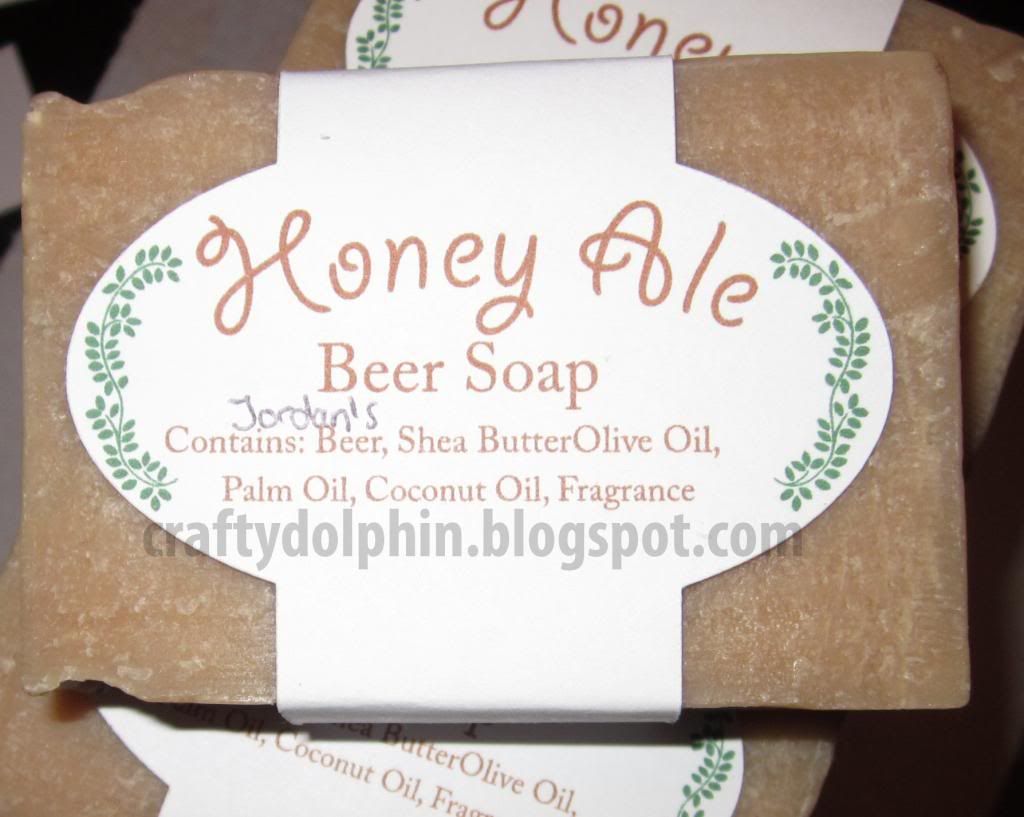
I made the label using Make-The-Cut and a Lettering Delights font and doodlebat. Each woman I gave a Christmas present to got a bar of this soap.
I forgot to take a picture of what I called The Man Soap. It had a lighter fragrance called Oatmeal Stout. It was mostly made of olive oil, but also had some coconut and a little palm oil as well. I also fixed the label to include my brother's name instead of writing it on all of them. All the men got a bar of this soap. The extra's went to my brother and his wife to use or hand out as gifts.
January 12, 2013
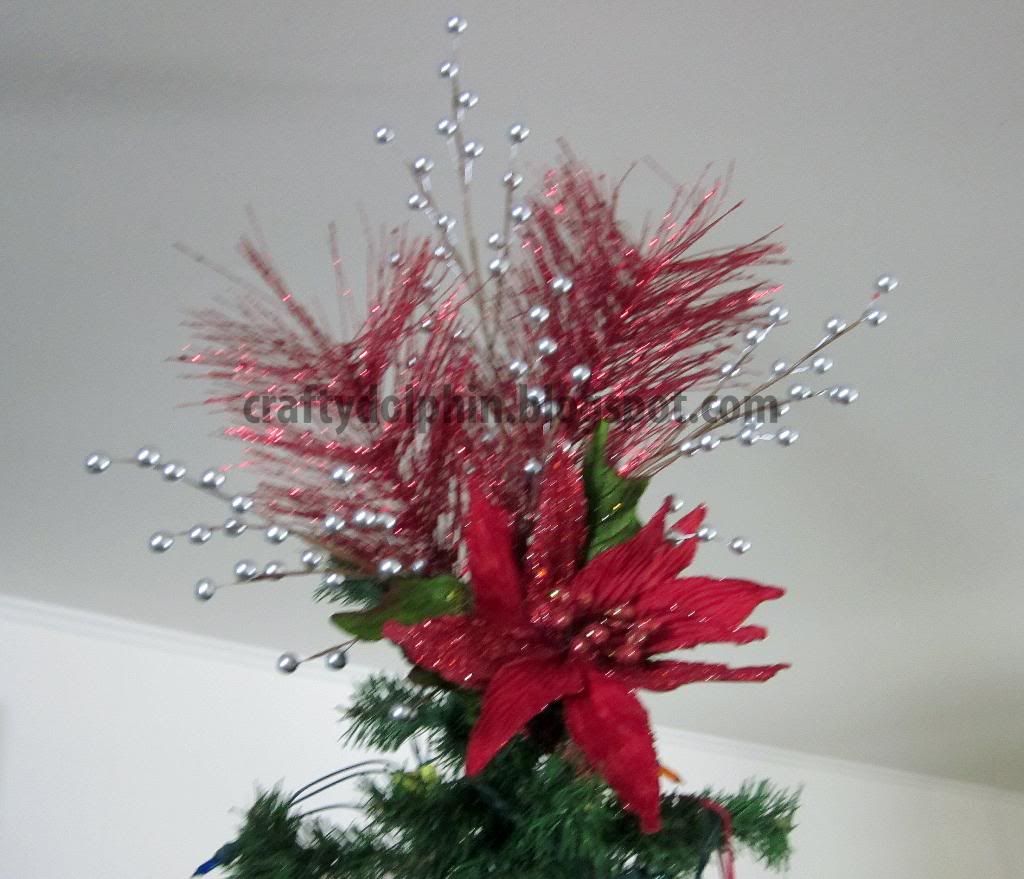
Christmas Tree Topper
2012 was our first year having a tall Christmas tree in the house. We had gotten the tree from my mother-in-law and I had very few ornaments and no tree topper. A trip to Hobby Lobby solved this. I didn't like any of the pre-made toppers they had so I decided to make my own on the fly. I pretty much just grabbed some Christmas floral type decorations and hoped for the best. I think it turned out well.
January 11, 2013
Jingle Belles Christmas Card Challenge
So last year I didn't get a chance at all to participate in any of the Jingle Belles challenges. This year I'm hoping to participate more, and so far so good. The challenge is to use something new that you may have gotten for Christmas. As one of my gifts, my husband got me a set of Tim Holtz's Distress Inks. I have never used them before but have been having a lot of fun with them. I also used the Mojo Monday sketch of the week, but didn't get it linked up in time.
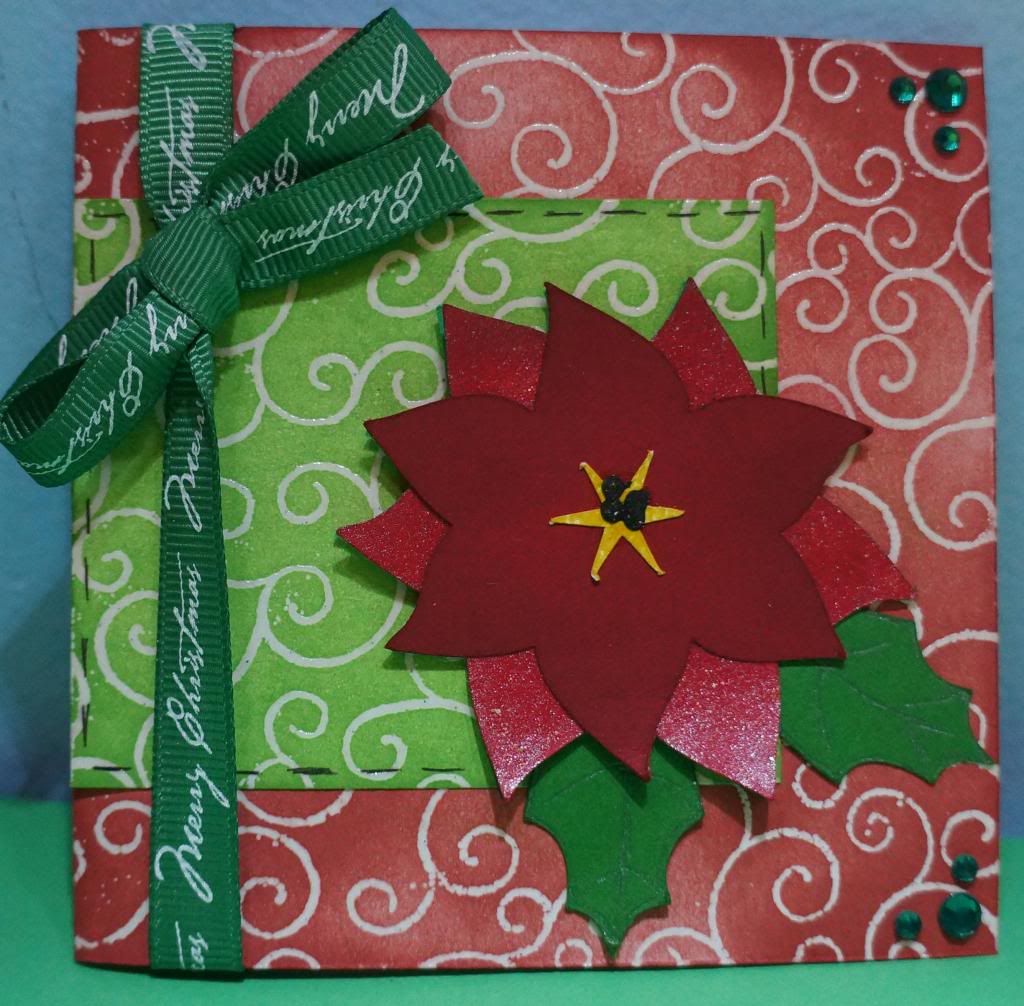
I tried the resist technique where you emboss using clear ink and clear powder, then inked over the embossing. The poinsettia is a Lettering Delights SVG file. I inked the leaves and the top layer, and covered the middle layer with the glitter Mod Podge.
I tried the resist technique where you emboss using clear ink and clear powder, then inked over the embossing. The poinsettia is a Lettering Delights SVG file. I inked the leaves and the top layer, and covered the middle layer with the glitter Mod Podge.
January 5, 2013
Art Journal Calendar - January 2013
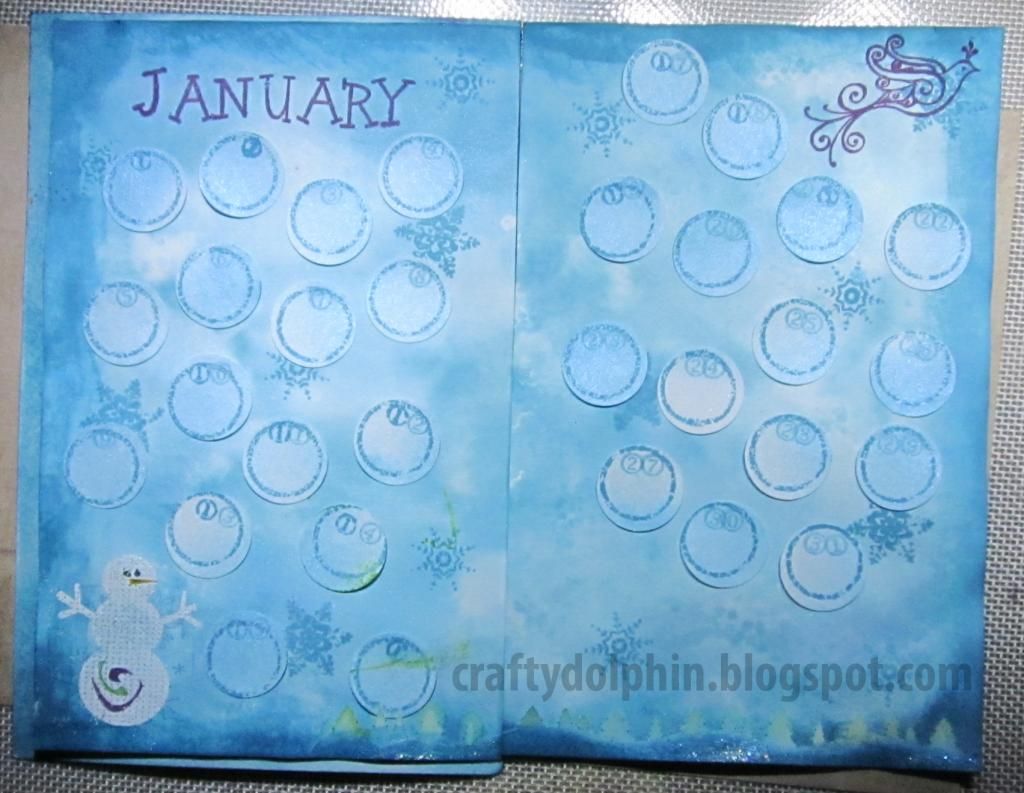
At the end of the year, I plan on using my Bind-It-All to bind all the pages. On the left side, you can see that the January page is glued to another. That is the cover and is still a work in progress.
For this page I mostly used my new distress inks I received for Christmas from my wonderful husband. I've never used them before and so far they're awesome. I also used a little bit of Glimmer Mist and the sparkly Mod Podge (down at the bottom of the pages).
So far so good...now I just have to start filling in the circles.
I hope everyone had a wonderful and safe holiday.
Subscribe to:
Posts (Atom)